This post may contain affiliate links. Click here to read my full disclosure.
Refinishing a bathtub is so much easier than I thought it would be. We first considered using a tub and tile kit to epoxy our rose-colored tub about 5 years ago when we bought a 1989 sprawling ranch home.
But I’ll be honest. I was scared to death I’d mess something up, making the tub even worse than it was before I started.
Afraid of Pinterest Fail
I’m a real estate agent in Springfield, IL, and I’ve seen some beautiful DIY jobs, and I’ve also seen some that turned out to be a massive Pinterest fail! We know that this home is not our “forever home”, so I’m very conscious about how much money we invest in repairs and renovations. We want the highest return on investment.
As a Realtor, I know that kitchens and bathrooms sell homes, but that doesn’t mean you should spend thousands on renovating them (especially if you know you’ll be selling in the future). And the value of a bathroom remodel varies by location and appraiser (quite frankly).
Bathtub Refinishing Cost & Supply List
The cost of the tub and tile refinishing kit was about $25, and we needed two kits for our large soaking tub. A standard bathtub would probably only need one kit. Total supplies added up to just under $100.
Here’s a list of supplies needed to refinish a bathtub:
-
(1) Rustoleum Tub & Tile Refinishing Kit – Note: You may need two kits if you have a large tub.
-
Sandpaper Sheets – I thought the fine-grit sandpaper would be great, but I ended up using my orbital sander with 120-grit sandpaper.
-
Tack Cloth *Very important! I’ll explain why in a minute.
-
(6) High-Density Foam Rollers *Only use high-density! If you try to use regular foam rollers, they’ll disintegrate quickly. This epoxy is STRONG!
-
Small Paint Roller to fit high-density foam rollers (these are much smaller than standard paint rollers). This set comes with some microfiber rollers that could be used for a future project along with a paint tray.
-
Respirator Mask – I used this one. It was cheap and it really helped with the fumes!
-
(2) High-Quality Paint Brushes – I used these Purdy stiff ones.
-
Painters’ Tape
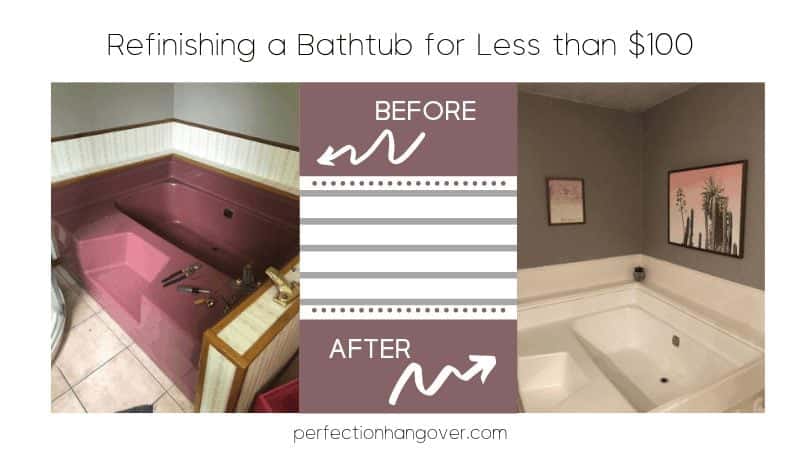
The Before Photo
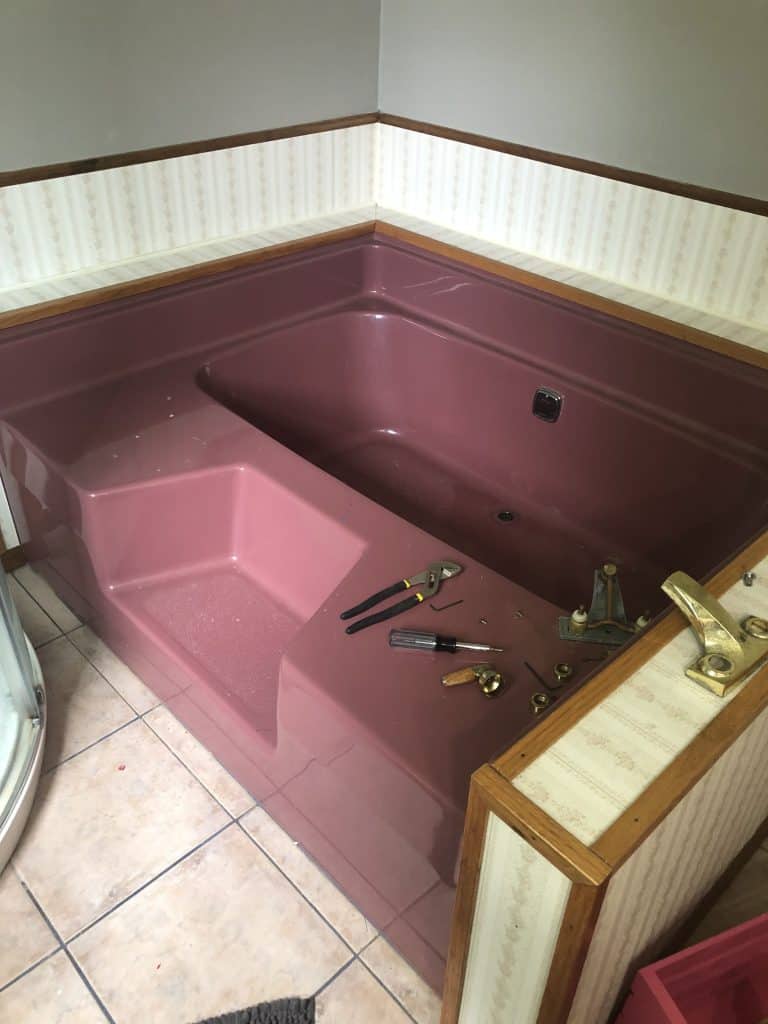
Pretty disgusting, right? This is my teenage daughter’s bathroom. She’s never once used this tub in five years. There were paint drips and dust and kitty prints all over this tub before I cleaned it! How ’bout that ugly particle board bathtub surround?!
Step by Step Guide to Refinishing a Bathtub
Step 1: Clean the Bathtub Thoroughly
There’s a bit of prep work involved in refinishing a bathtub. The good news is, you probably have a really good cleaning agent lying around at home already. CLR and Limeaway work great at scrubbing all of the filth off of the tub. You’ll want to ensure it’s sparkling clean and let it dry completely before moving on to the next step.
Side Note: I watched a lot of YouTube videos on refinishing a tub, and many suggested using steel wool to scuff up the tub. I tried this, and it’s a massive waste of time and will only leave your arms tired. Instead of using steel wool, consider buying an orbital sander to do the heavy work for you. I tried sanding by hand for a few minutes before I decided to try the palm sander.
Yes, it’s messy. But it saves you probably at least an hour of prep time. And your arms will thank you! This one is super cheap and will get the job done.
Step 2: It’s Time to Start Sanding
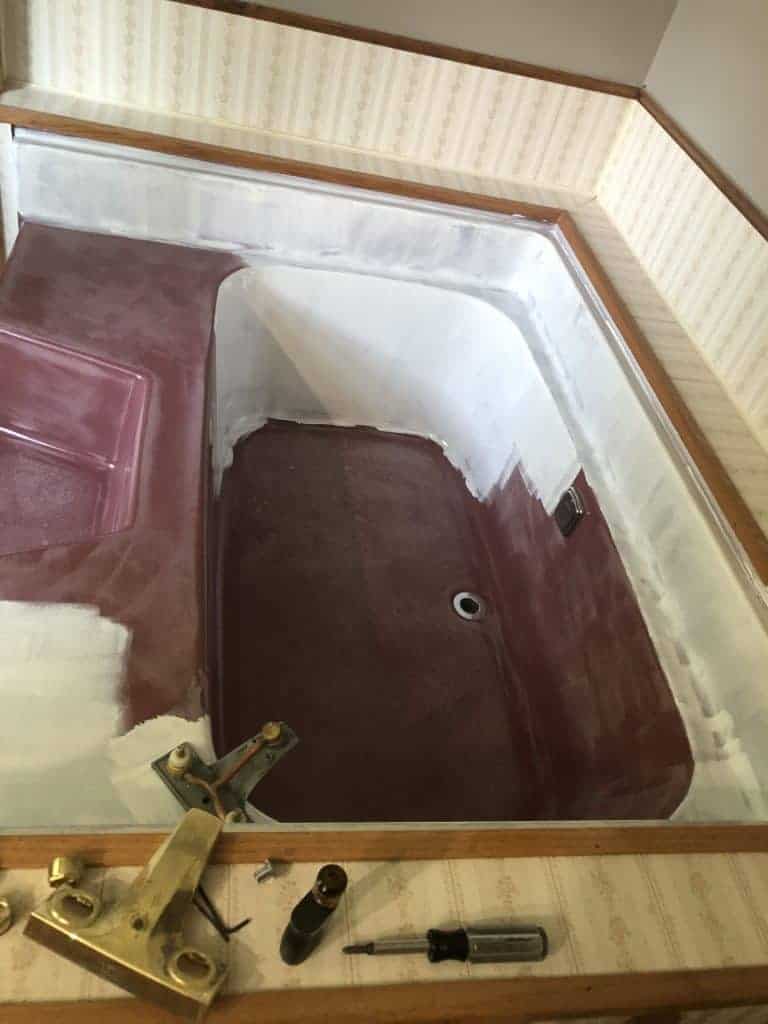
I really enjoyed this step. I don’t know why, but it’s fun trashing something just a bit before making it beautiful! Using either 120-grit sandpaper or your palm sander, work in a circular motion until the surface is good and rough.
It only took about 5 minutes of work with my orbital sander to get started with the fun stuff!
Step 3: Tack Cloth is your Best Friend
Aside from the bathtub refinishing kit, the tack cloth is the second most important item when it comes to refinishing a bathtub. Start with a wet washcloth and wipe away any dust particles from the bathtub surface. After allowing it to dry, you’ll use the tack cloth to wipe away the excess dust. It’s absolutely crucial that you remove any and all dust particles so that you’re working with a flat surface!
A single piece of dust will leave a rough spot on the tub, and you’ll be frustrated. Trust me. I have a few of those dots I decided not to bother with, and it still looks beautiful!
Step 4: Tape Around Fixtures and Walls
Using your painters’ tape, you’ll want to tape off any fixtures and the wall so that you don’t get epoxy on your metal finishes. You can place your tape over the drain and use a razor blade to cut a perfect circle.
Step 5: Mix the Two-Part Epoxy
Pour the small can into the large can and mix well with a paint stick. This stuff is runny so be careful stirring!
Step 6: It’s Time for the First Coat of Epoxy!
Now the fun truly begins! Make sure the area is well ventilated (windows and doors open) and turn a box fan on high facing the window…NOT the bathtub! I repeat….do not turn a fan on facing your bathtub because it will definitely throw dust up on your freshly clean tub. This seems obvious, but I’m trying to save you some frustration.
Using your Purdy stiff paintbrush, start “cutting in” around the edges of the tub. You’ll want to start from the back of the bathtub, while standing in it, working your way forward.
Only use the brush for cutting in and areas where the foam roller struggles to get a smooth coat.
This epoxy is self-leveling, so if it looks streaky at first, don’t freak out. It’ll level out to a beautiful finish when you’re done.
After you’ve cut in, it’s time to grab a high-density foam roller and start rolling with the shape of the tub. For the inside corners of the bathtub, you’ll turn your roller sideways and roll horizontally. Remember to work your way from back to front so that you’re not having to reach over your wet areas.
Side Note: Even with the high-density foam rollers, you’ll notice they start to disintegrate (mostly on the tip). Change out the rollers between every single coat (at minimum). You might only need 2-3 rollers. I used 5 since my tub is larger.
Step 7: Wait for It…
This is the part where, if you’re impatient like me, you want to rush things. Don’t do that. Let your first coat dry overnight before you even think of putting another coat of epoxy on the bathtub.
While you’re waiting for the first coat to dry, cover your epoxy with saran wrap and throw away your used paint brush and foam roller. These are not salvageable. Tomorrow you can get to work on the second coat. I think you’ll be surprised by how smooth and beautiful it is after just one coat!
Step 8: Time for a Second Coat of Epoxy
Using your tack cloth, make sure you have a clean surface, free of dirt and debris. Repeat Step 6, covering your entire tub with a good, thick coat.
You might need a third coat depending on your thickness of coats, the color and size of the tub you’re refinishing.
The Dramatic Reveal: Is Refinishing a Bathtub Worth It?
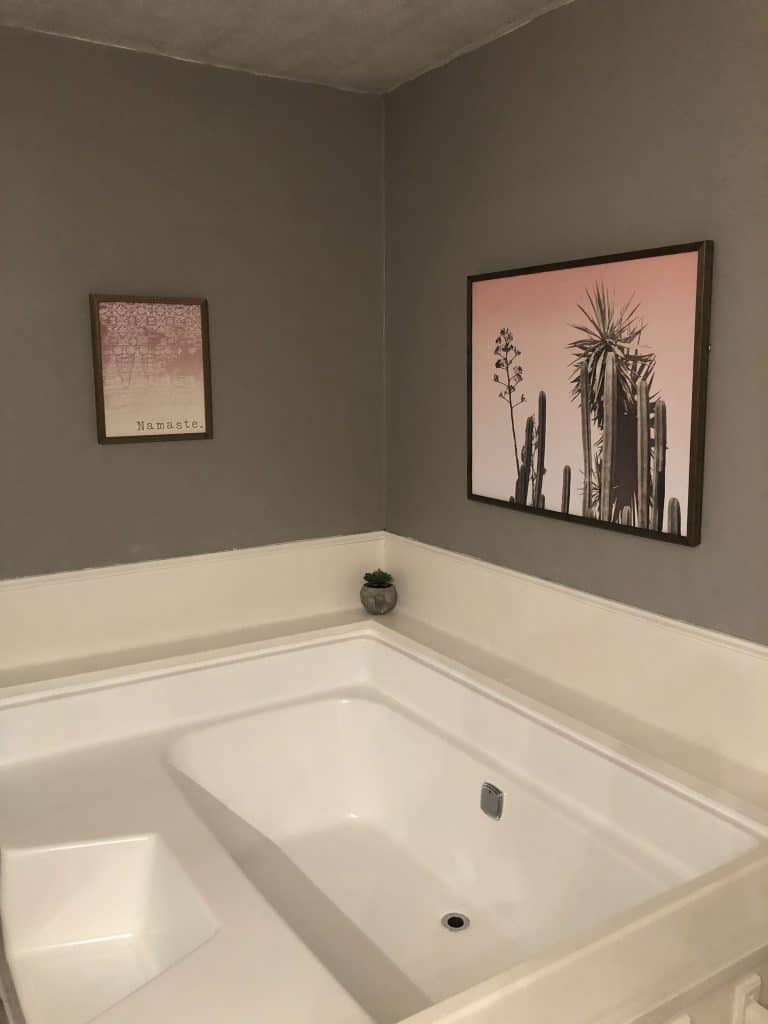
You have to wait a minimum of 72 hours before turning the water on in your bathtub. This means you’ll want to wait to install your new faucet until it’s fully cured. You definitely don’t want to sabotage your efforts!
It would have cost me over $1,000 to buy a new bathtub, replace the flooring, and patch drywall, and by refinishing a bathtub, I was able to save 90% or more!
What do you think? Was it worth it? Do you think potential buyers will even notice that it’s original to the home?

Life is a collection of memories and experiences. There are ups and downs. I am so grateful for God’s grace and am on the journey to a renewed spirit, free of perfectionism. Perfection Hangover offers the sober truth – no filter.


I actually liked the previous color better than the plain white 🙁 but I’m sure it’d definitely appeal to the mass majority with it refinished! Nice work
Great content!
Redecorating and making repairs in your bathroom can improve the value of your home. Bathtubs can be expensive to replace. Making your old bathtub look like new isn’t as difficult as it may seem. So the question is: how to refinish a bathtub.
It is important to not only have the supplies to do your job, but you need to have the safety supplies as well. When you refinish a bathtub, you need to have a well-ventilated area and you are going to want to use a good face mask. If you have no windows in your bathroom, you might want to get a respirator. Whatever you choose, you need to protect your respiratory system when you are refinishing your bathtub.
Very informative, easy to follow, and well written. I really enjoyed reading this article and learned a lot about the process of refinishing my bathtub. It was so helpful that there were many before, during, and after photos, which helped me to visualize what each step in the process looked like as it was happening.
Thanks for sharing such an informative article. You described all the things about bathtub refinishing expertly. It really inspires me.
It’s good to know that an orbital sander can help scrub the filth off a bathtub. My wife is wanting to refinish our bathtub in the master bathroom this summer since it’s getting stained. We’ll have to clean it out before hiring a professional to do the actual refinishing part.
Good call! Don’t forget to use the tack cloths to get rid of all of the extra dirt and grime!